
Data Files
The Data Files page allows users to upload the data that is the main part of the Dataset. Individual files or entire folders can be uploaded via this page. The data uploaded via this page should be in CSV (comma-separated values) format.
- Log in to the RDA
Default view of RDA user interface
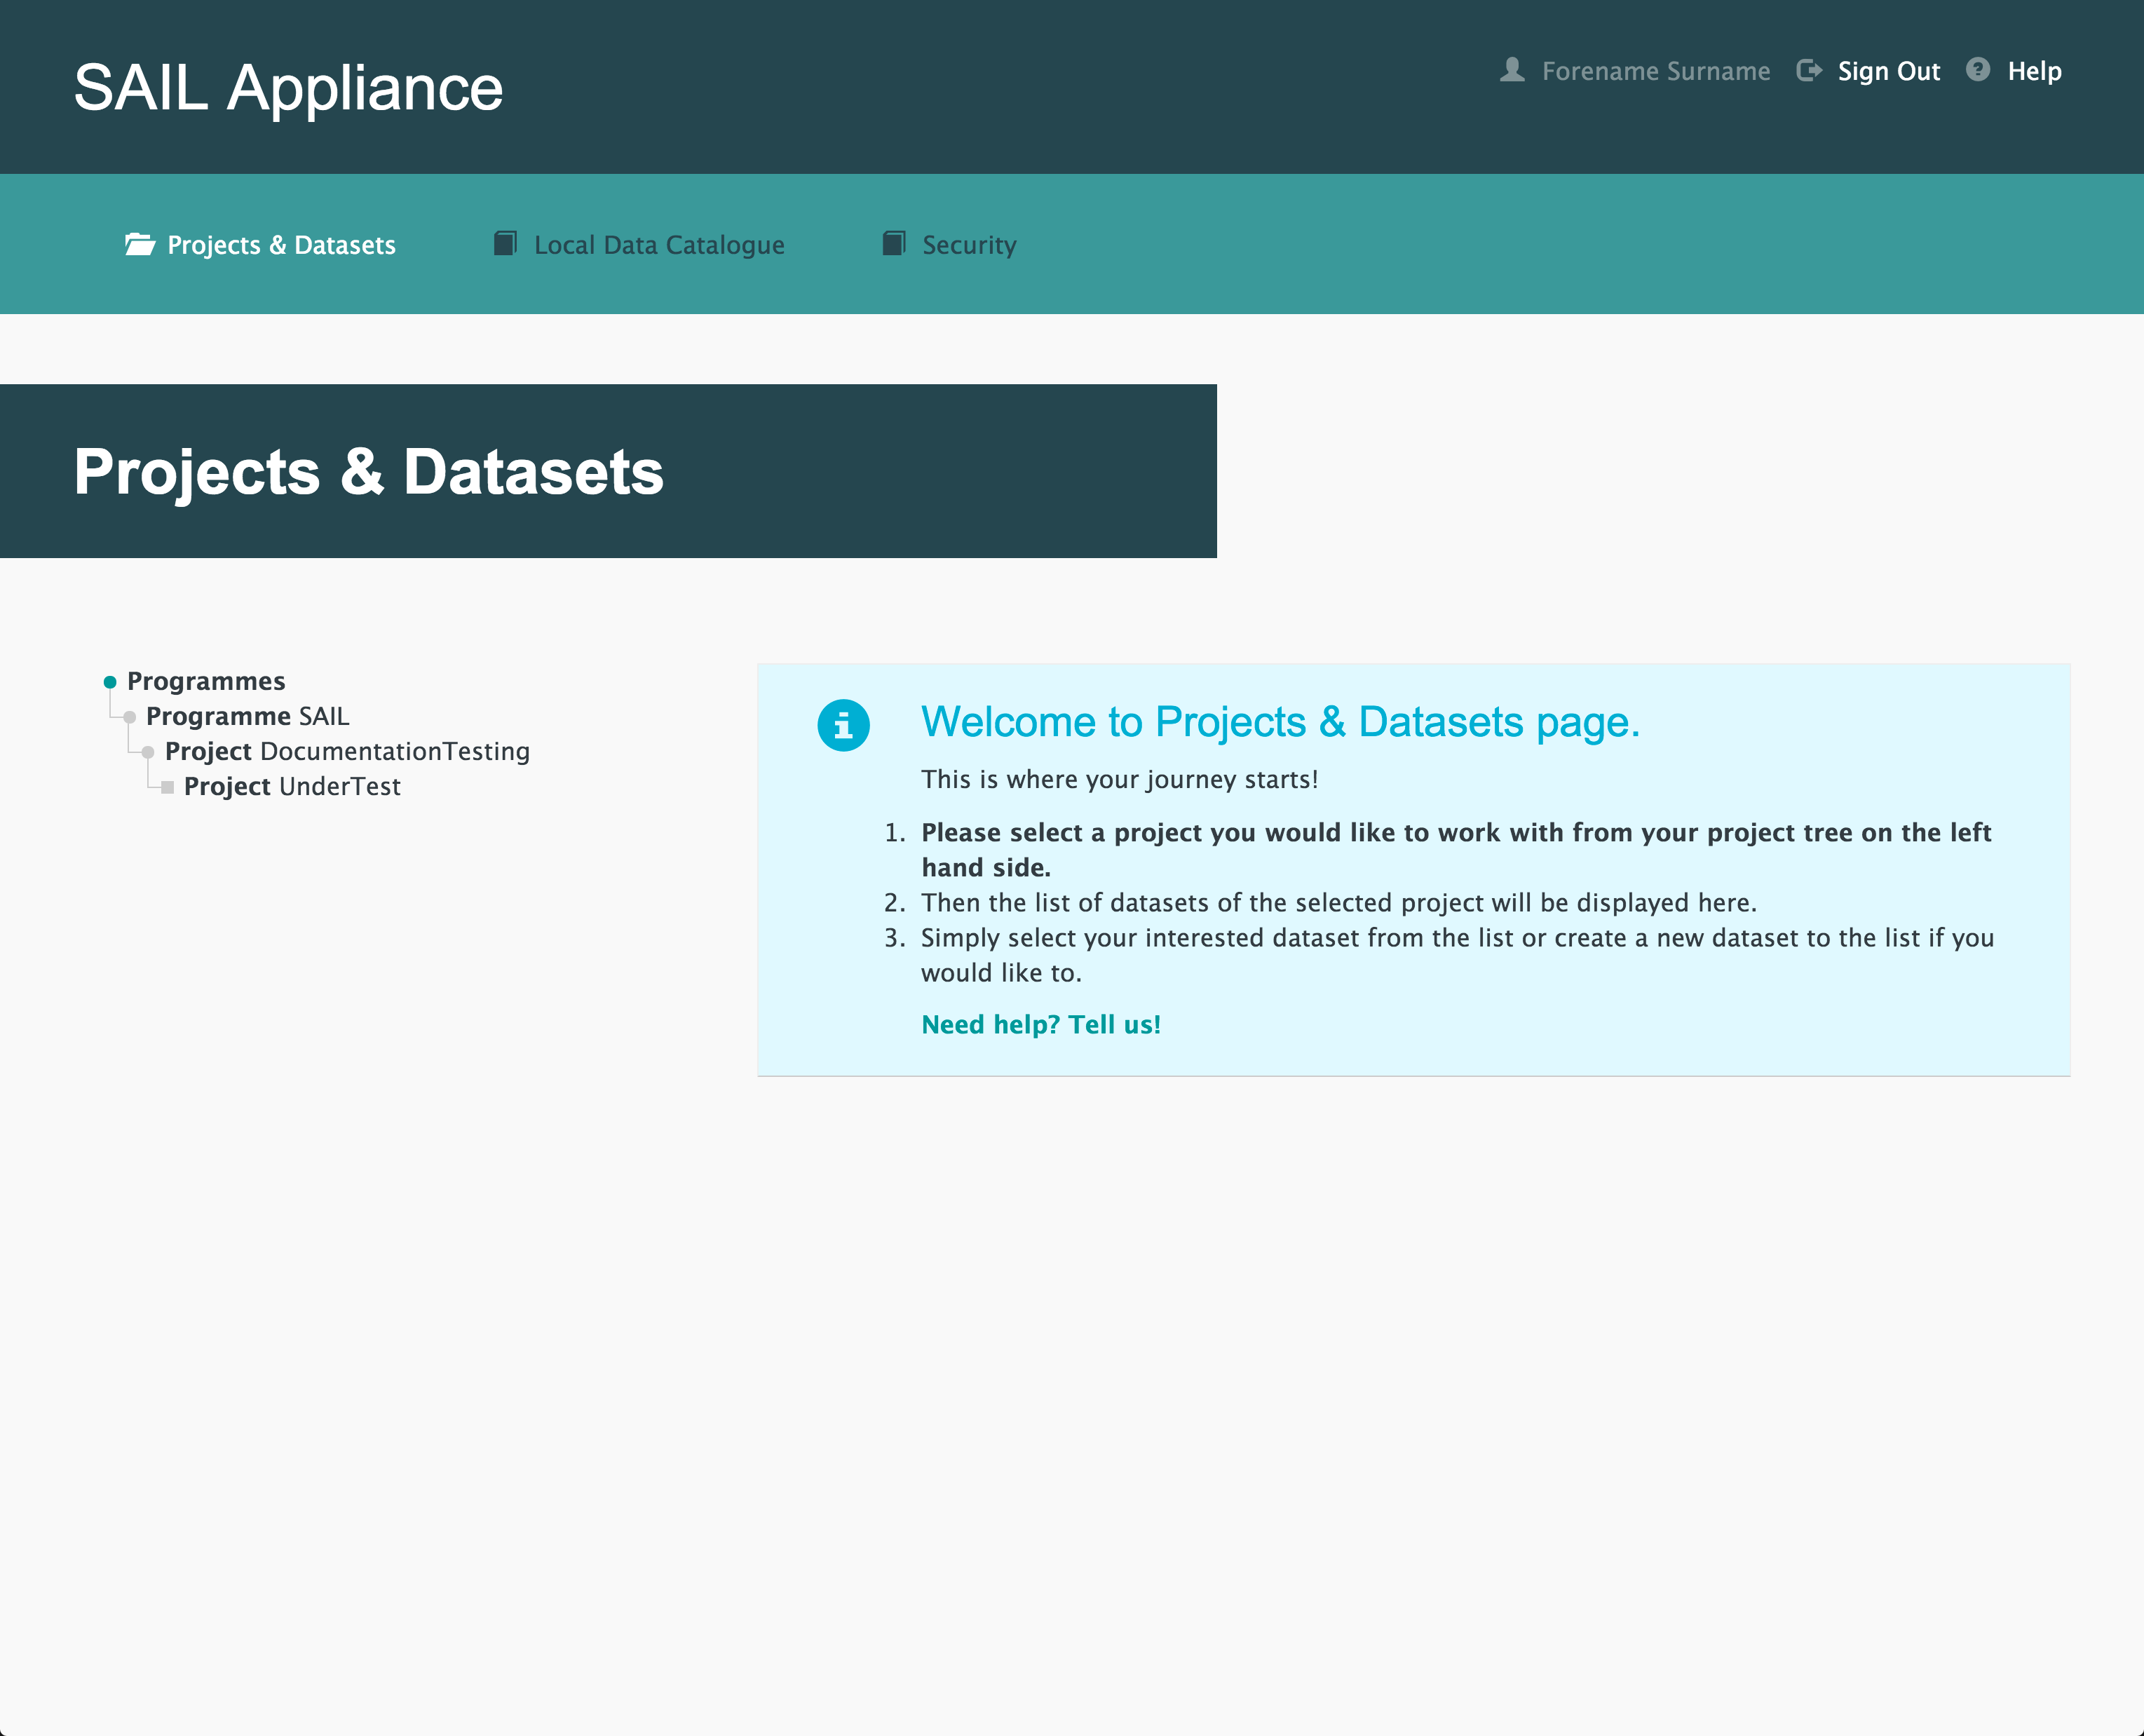
- Click Projects & Datasets

Projects & Datasets menu item
The Projects & Datasets section is selected by default.
- Select a Project from the left-hand navigation menu

Left-hand navigation menu showing available Projects
- Click
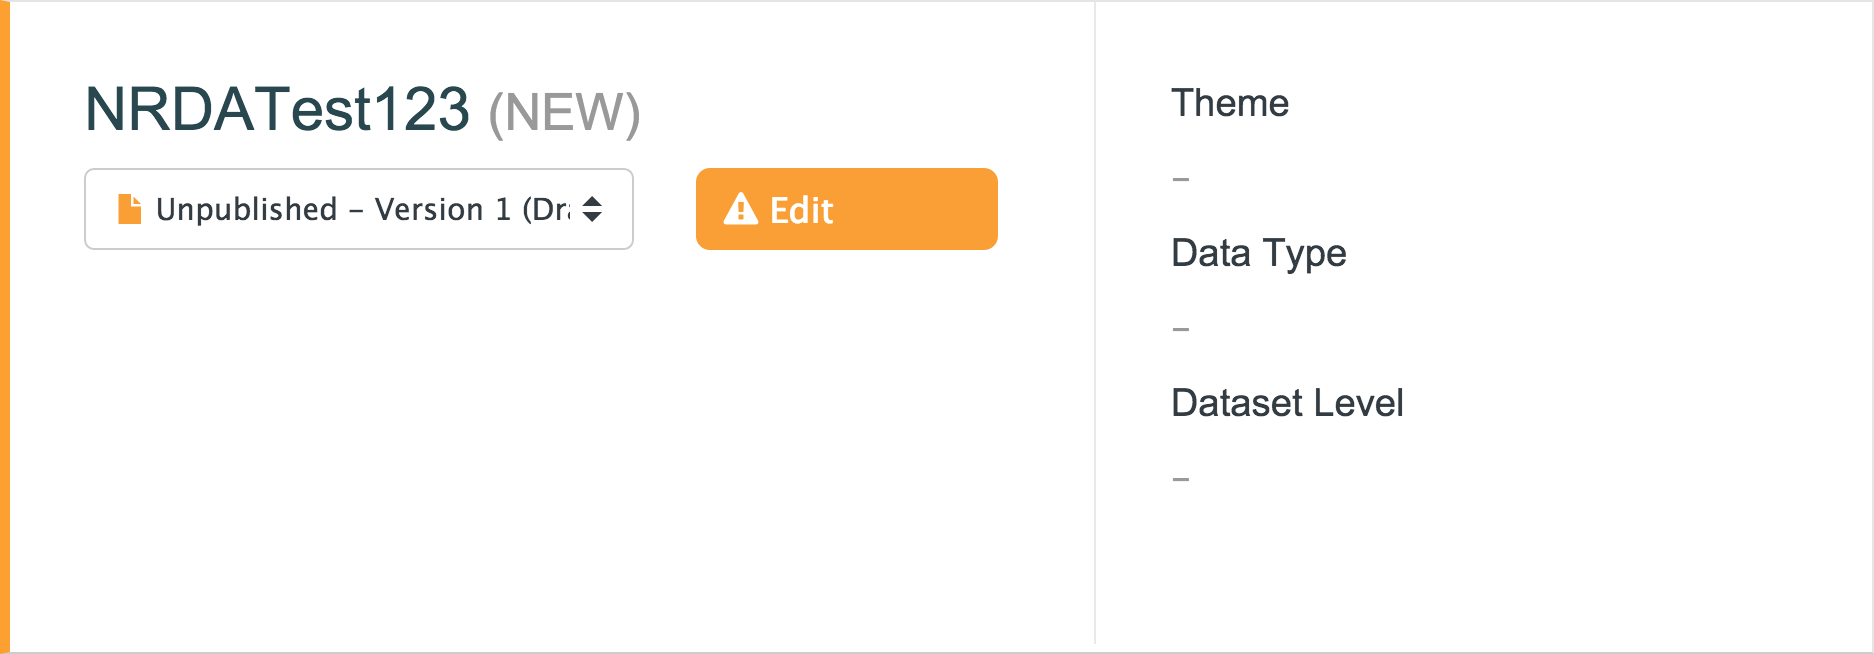
Sample unpublished Dataset
- Click Data Files

Data Files menu item
The default view of the Data Files page is shown below:

Default view of Data Files page with no data added
- This button allows the user to add data to the Dataset
A Dataset cannot be published until all mandatory fields on the Data Files page have been completed. See Pre-Publish for more information.
To upload data to the Dataset, see How to upload data.
Once data has been uploaded, clicking the Data Import Settings link opens the Data Details section. This allows the user to provide more information about the data, as shown below:
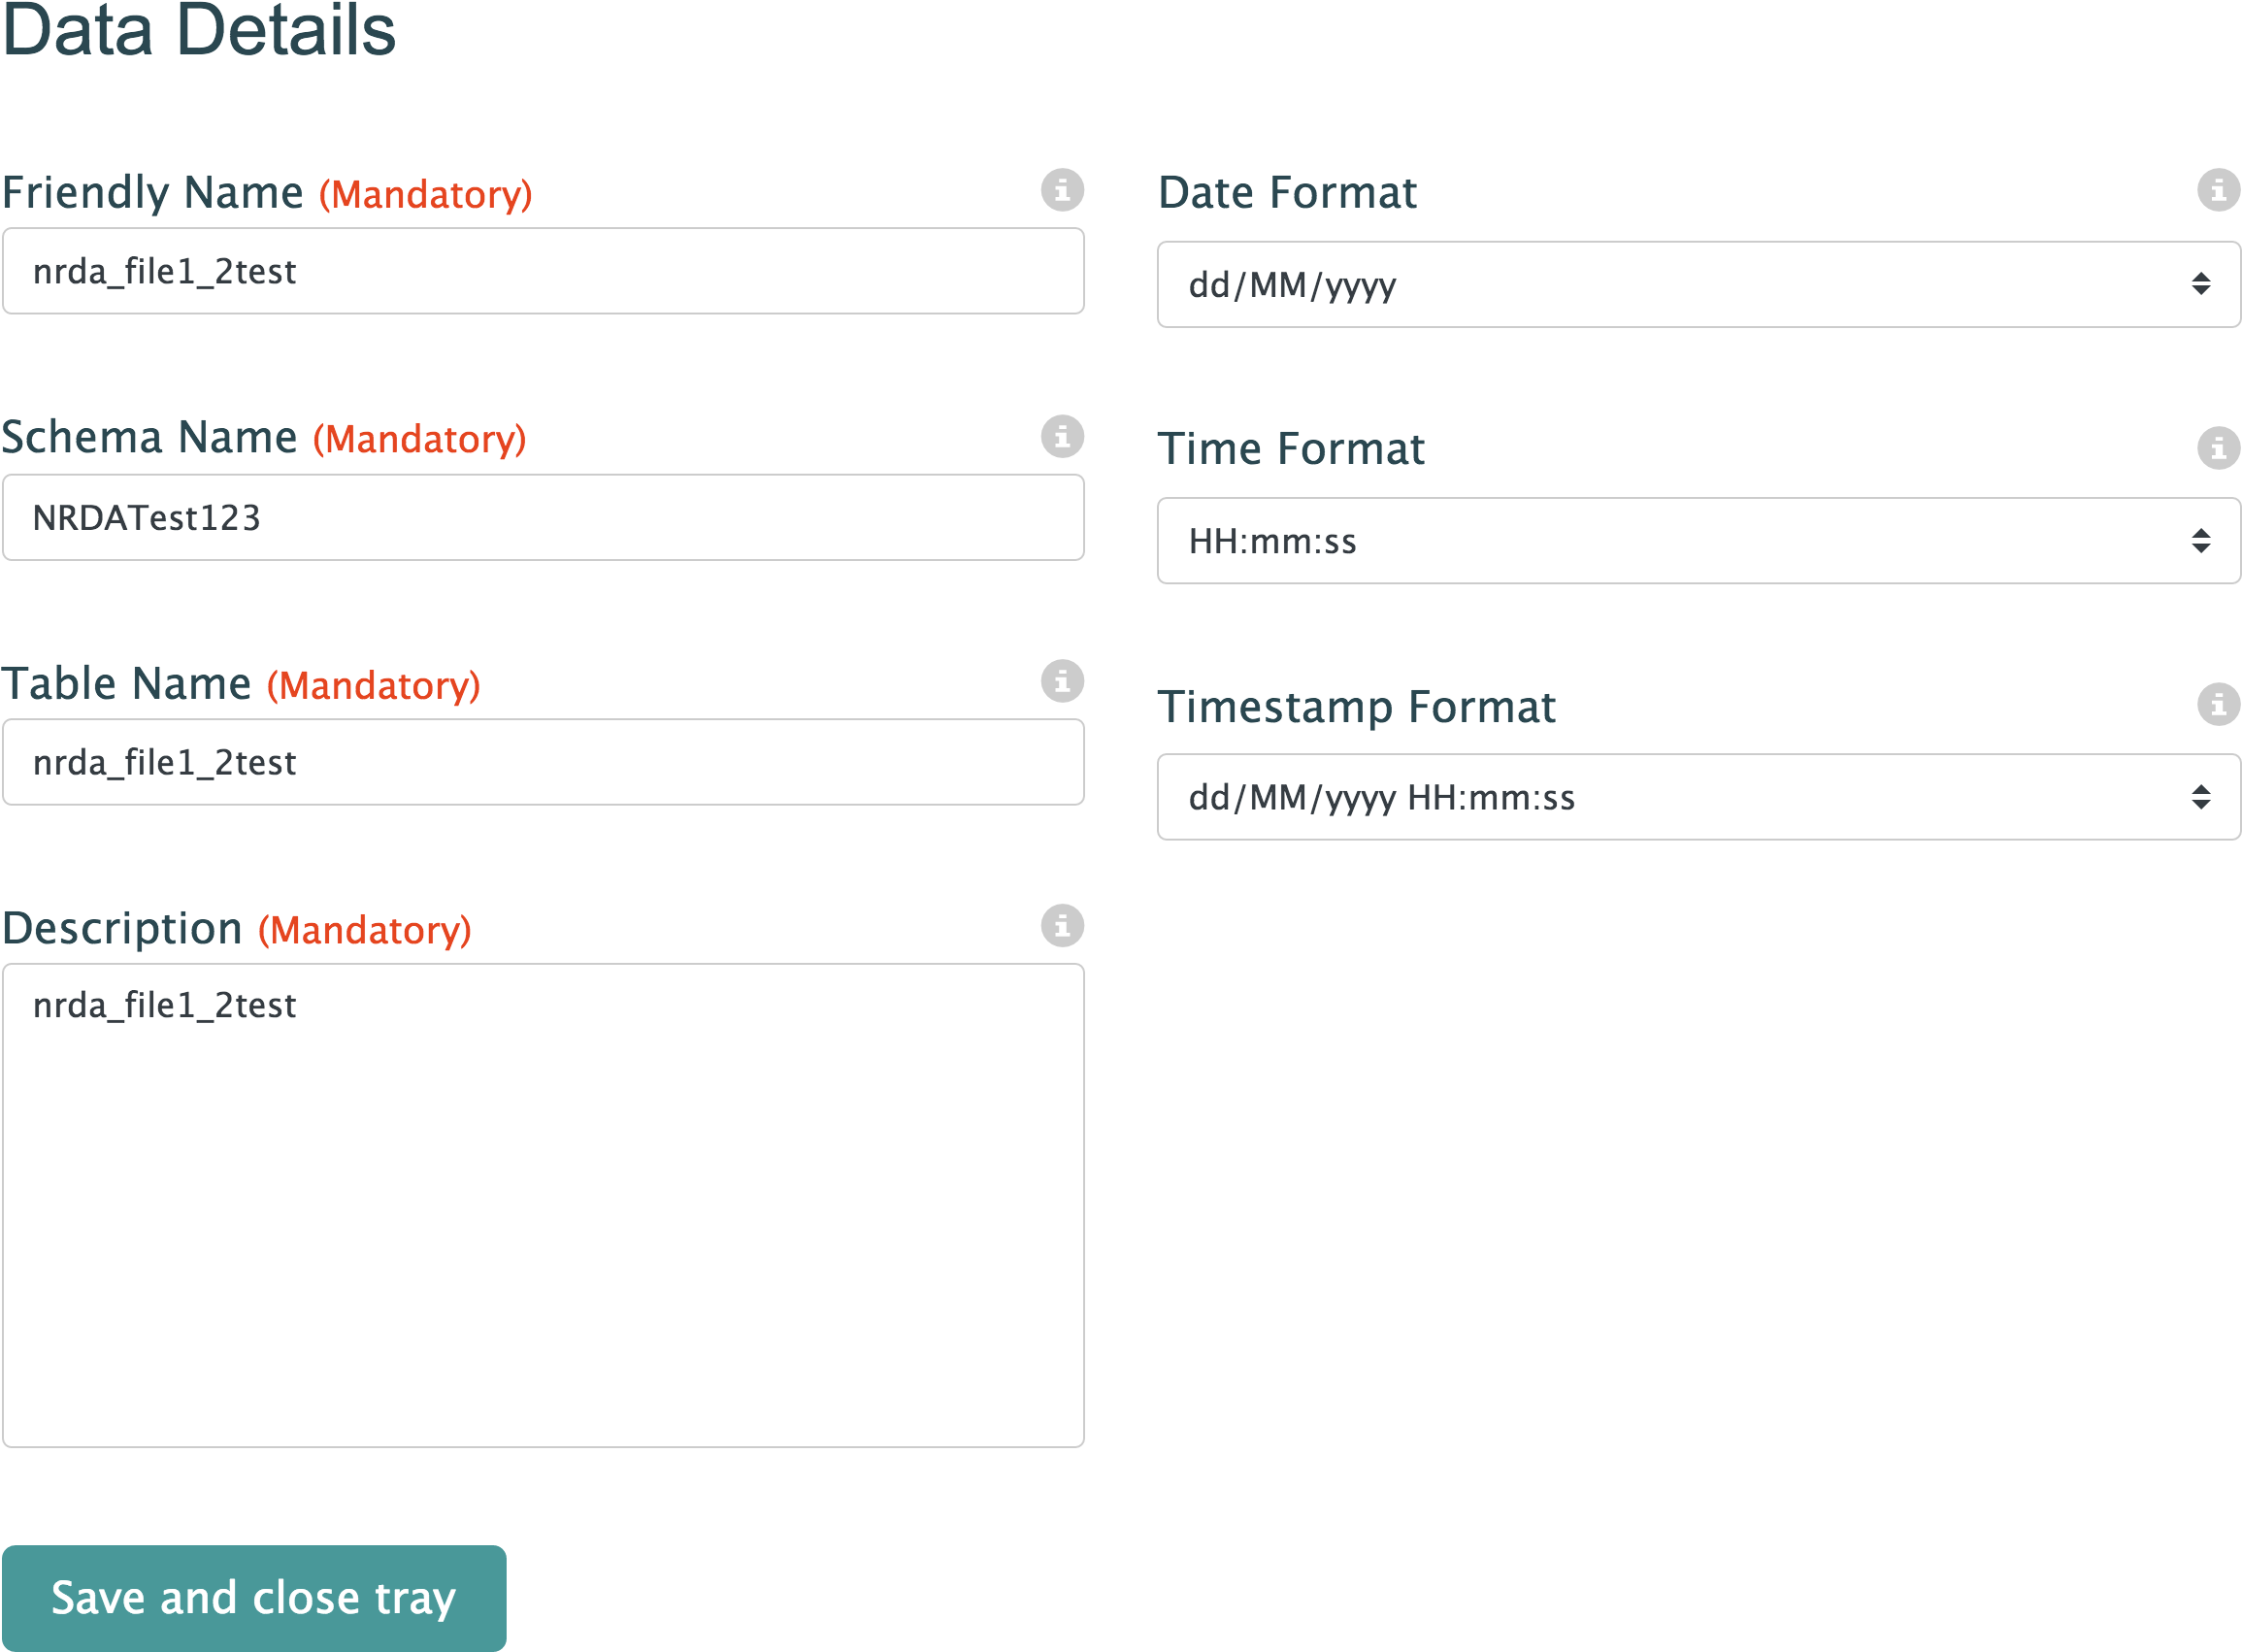
- Friendly Name (Mandatory)
- A meaningful name for the data
- Date Format
- The date format in which the data is to be supplied. The default format is dd/MM/yyyy
- Schema Name (Mandatory)
- The name of the schema
- Time Format
- The time format in which the data is to be supplied. The default format is HH:mm:ss
- Table Name (Mandatory)
- The name of the table
- The date and time format in which the data is to be supplied. The default format is dd/MM/yyyy HH:mm:ss
- Description (Mandatory)
- A meaningful description of the data
- Click this button to save the settings and hide the Data Import Settings panel
Once data has been uploaded, clicking the Data Details link opens the Data Import Settings section. This allows the user to provide more information about the data, as shown below:
Click any column to allow editing of any fields within that column. Only one column may be edited at a time.
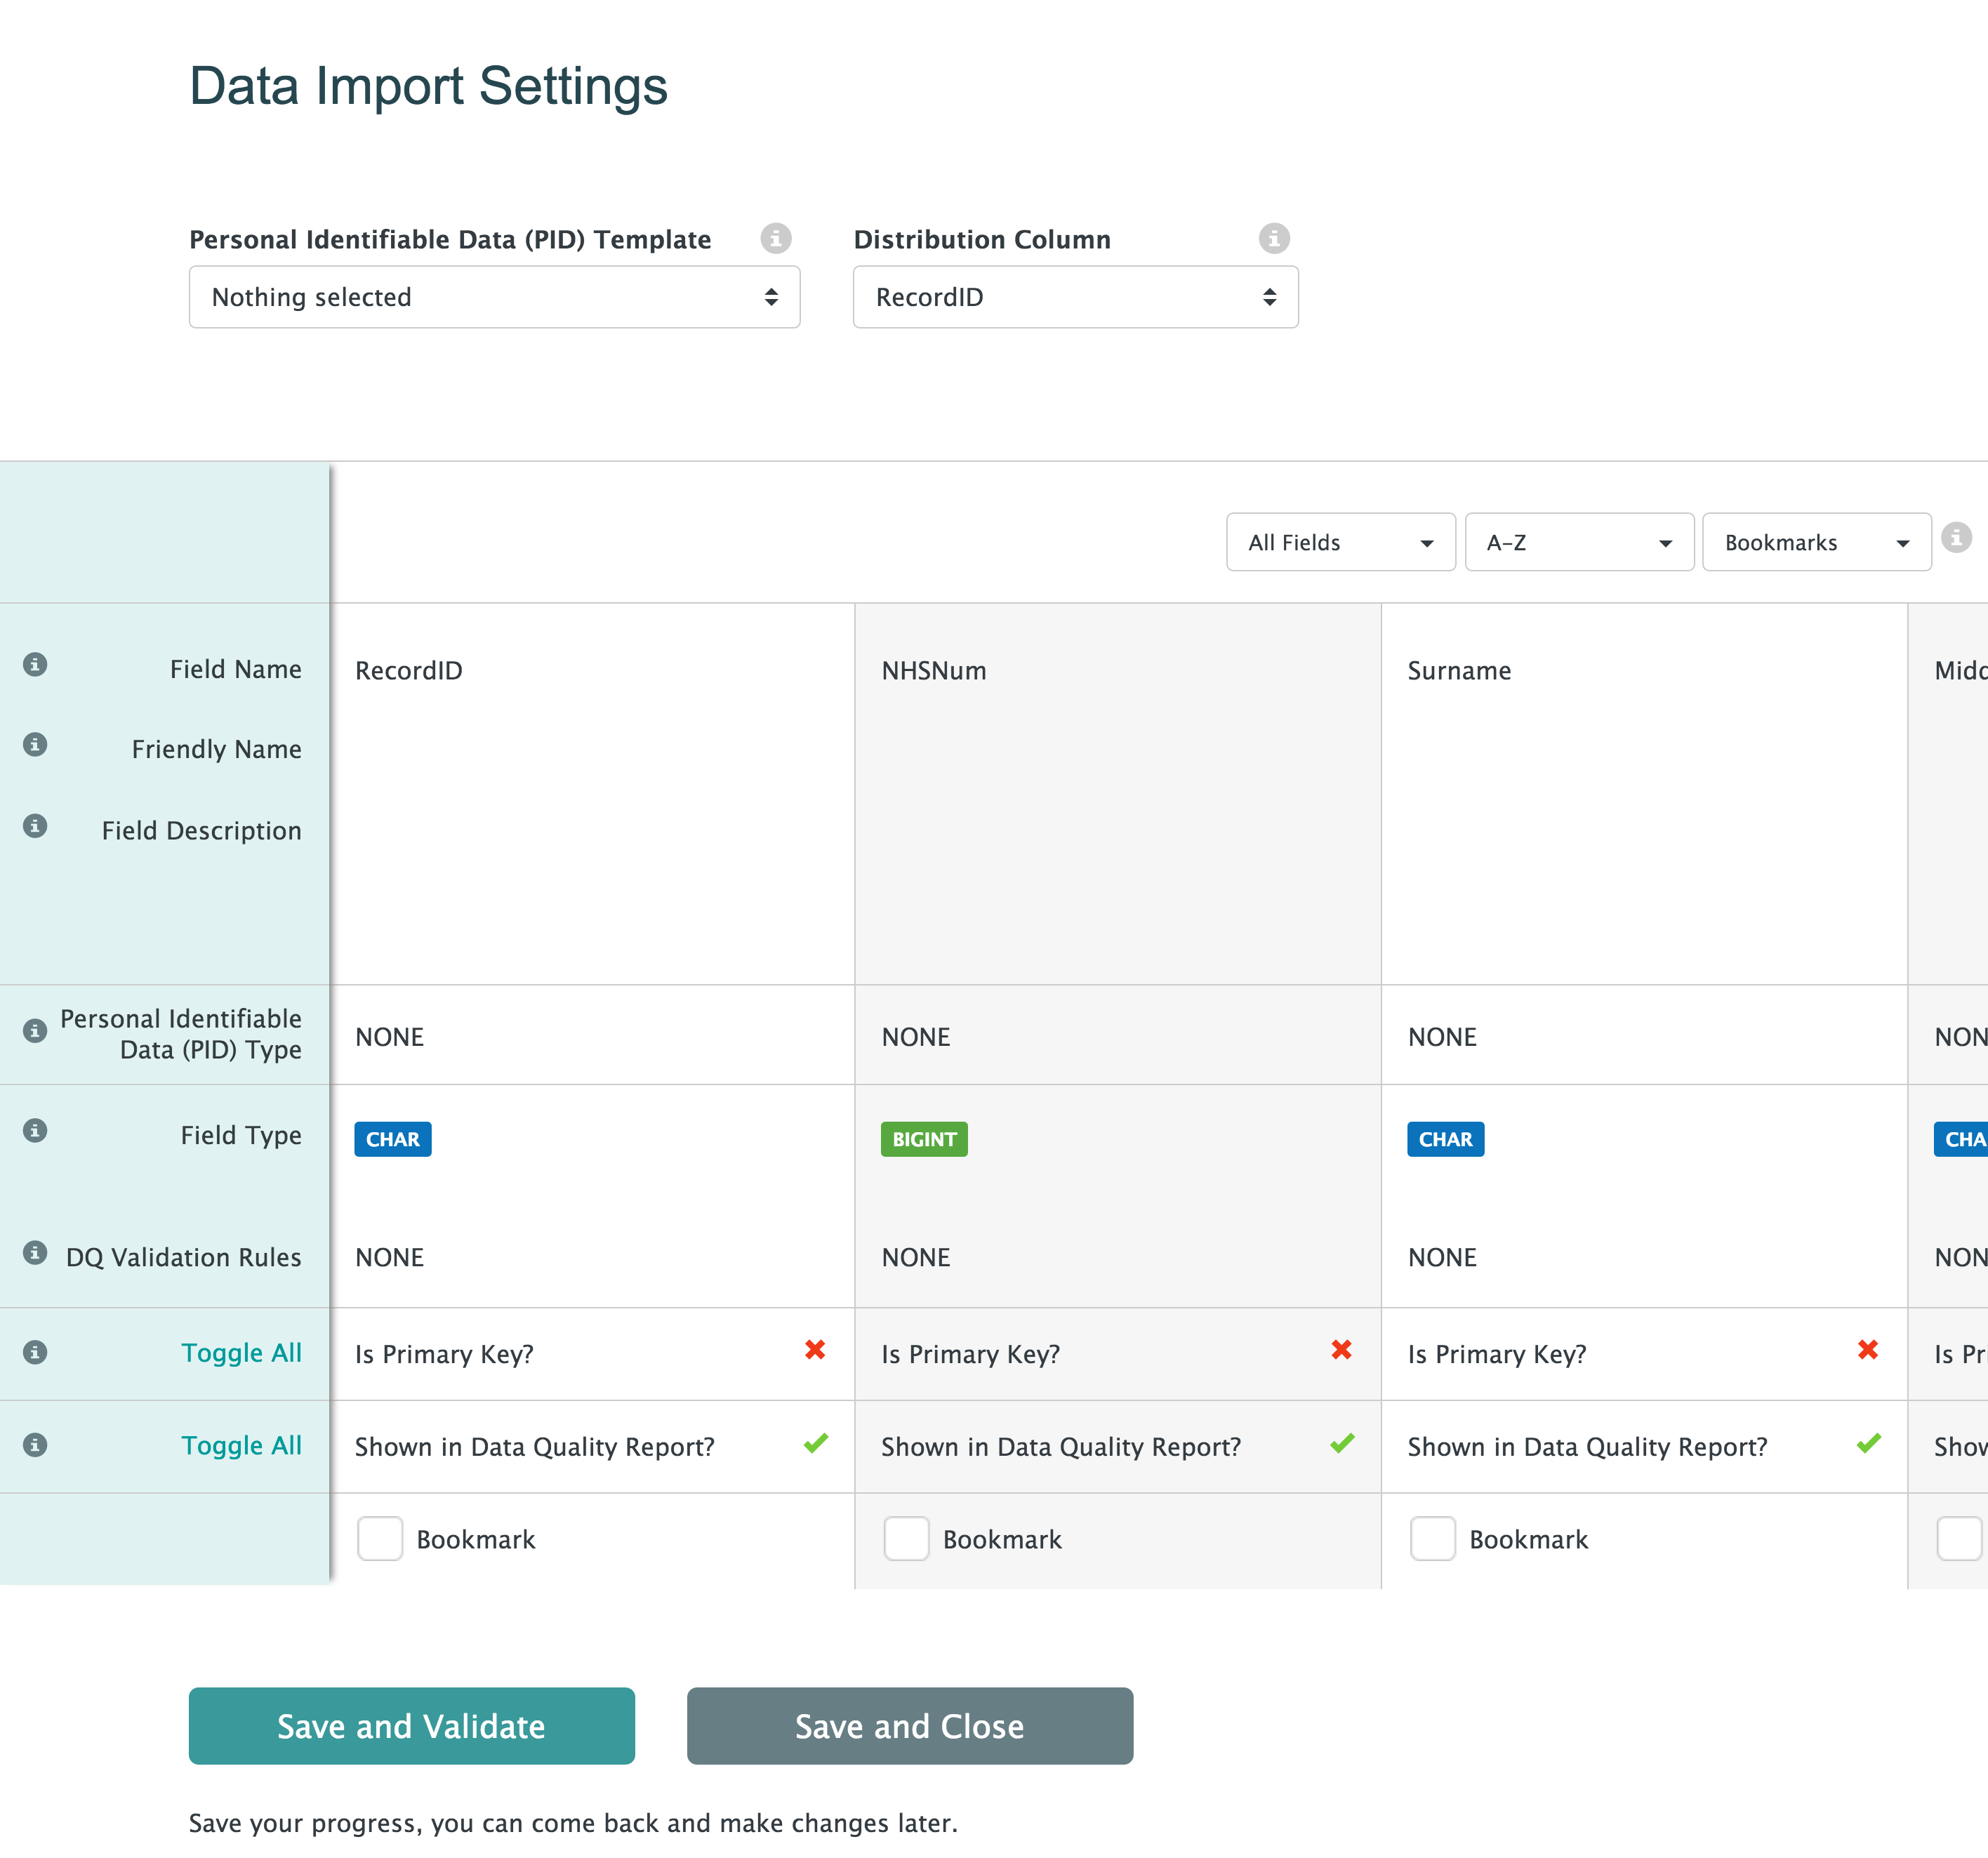
Data Import Settings
- Personal Identifiable Data (PID) Template
- Choose a template that matches the Personal Identifiable Data in the uploaded data
- Distribution Column
- This allows data to be split among the partitions when data is uploaded to SAIL. There should be no need to change the default setting
- Field Name
- Automatically generated names of fields in the uploaded data. Any spaces in the data are replaced with underscores. The field names can be adjusted, but this should not be necessary
- Friendly Name
- A meaningful name for the field, which will be useful to a user who is not familiar with the data
- Field Description
- A short description of the data contained within the field
- Personal Identifiable Data (PID) Type
- The type of Personal Identifiable Data (if any) in the field. A Personal Identifiable Data Template must be chosen before this field can be edited
- Field Type
- An automated assessment of the type of data in the field, e.g. CHAR for alphanumeric data of a defined size
- DQ Validation Rules
- Add validation rules to confirm that the data is imported correctly More info
- NONE – Default if no DQ rule is given
- Range – If the data should fall between two values, then specify the Min and Max values and this field's data will be validated during publish. Validation errors will be reported in the Data Quality Report. For numeric, date, time and datetime data types only
- Local Lookup – validate all the data of selected field against a temporary lookup table. All the valid values for the data field should be added in the local lookup table section. Any value of the field that cannot be found in the table is marked as invalid in the Data Quality Report. This option is recommended for use if a small number of valid values are dedicated to a certain field
- Reference Table – validate all the data of the selected field against certain values in a database lookup table by specifying the lookup table dataset name, lookup table name, and the lookup column name. Those values from the DB lookup table should contain all the valid values for that data field. Any value of the field that cannot be found in the lookup table is marked as invalid in the Data Quality Report
- Primary Key
- Tick this box to show that the field contains a unique identifier, e.g. an email address. More than one field may be marked as a Primary Key
- Show in Data Quality Report
- Tick this box to include the field in the Data Quality Report. Fields that are not relevant should be excluded
- Bookmark
- Tick this box to mark the field as a bookmark
- Click this button to save the changes and validate the data. The Pre-Publish process cannot proceed until all data has been validated
- Click this button to save the changes and close the Data Details panel without attempting to validate the data
Next step
After uploading and validating the data, add any Supporting Files.
Concept Information
Related Tasks